
The Ultimate Bird Control guide ~ by AlloutBlitzle (Guest Writer)
Hello, readers! I’m James Kowalski, probably better known as Alloutblitzle on YouTube and Limitless. I have been playing the TCG for nearly 10 years across all 3 age divisions! I recently made the first Day Two of my career at Orlando Regionals (my first regionals as a Master) with Bird Control. Here’s a complete guide on the list and why I absolutely enjoy playing it.
The List

(Note: +1 Mist Energy at the very bottom)
Bird Control has had a couple versions throughout its existence. With the Quick Search engine, you are able to utilize a disgusting amount of one-ofs to their full potential. This deck doesn't just have one win condition. Depending on the matchup or how the game is going, you can flip your gameplan to exploit whatever particular area in which your opponent is weak.
Set up cards

One of Bird Control’s weaknesses is it can be quite fragile in the early game before you have Pidgeot ex set up. Rotom V is key to this deck’s early set up. Not only does it let you build your hand early on when you don’t have anything else to do, it also can hold Forest Seal Stone. Star Alchemy gives us a VSTAR power and really helps smooth over our early game.
Lumineon V hasn't been a mainstay in most Control lists, (most players preferring Pokegear for early game supporter search) but it makes a lot of sense here. Lumineon guarantees Arven and we get to shove more Ultra Balls into our deck, which also help our setups going first.

By playing more Ultra Balls in our deck, we can better utilize Cleffa. With the one-of Buddy-Buddy Poffin in the list, we can search for Cleffa and Pidgey off of an Arven. The Rescue Board can also be grabbed off of Arven if you need to get Cleffa active.
Attackers
Bird Control has a mix of conventional attackers and disruptive attackers. Despite being a deck that’s known for decking your opponent out, you will take prizes very often with this deck. One of the best ways to remove potential win conditions for our opponent is by taking out their only offensive threats.
Radiant Charizard has been in almost every successful Bird Control list, because it’s a super efficient single prize attacker that deals big damage. A staple endgame play for us is to Iono our opponent to a low hand and KO their active with a caped Rad Zard, forcing our opponent to respond.

Wigglytuff ex may just seem like a goofy card (it is), but it’s surprisingly very important in a lot of matchups. The combination of 450 HP (with Hero’s Cape attached) and doing a solid amount of damage is very awkward for a lot of decks to deal with. Even if Wigglytuff isn't good in that particular matchup, don't forget about “Lead” on Jigglypuff to help secure Arven early on!
Mawile has one job in this list: retreat lock. Compared to Snorlax, Mawile is better at locking in most situations since bossing around Mawile does not result in the lock being broken.
Luxray V is a very important attacker. For just a single energy attachment, we can discard whatever Trainer card we like from our opponent's hand. If we slap a Bravery Charm on it, we are usually tanking hits and can Penny it up to deny prizes and even reuse it.
Chi-Yu ex is similar to Luxray, but it removes cards from your opponent’s deck instead of their hand. It can be a great option to force our opponent to play the game or as a surprise finisher if our opponent has a few cards in deck.
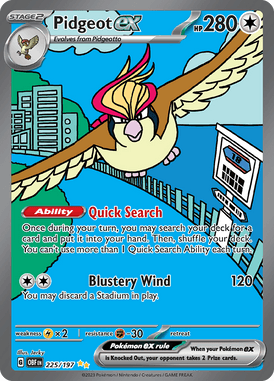
Don't underestimate Pidgeot ex as an attacker either! For one energy attachment we can play aggressive, we just have to be careful not to jeopardize our search engine.
Walls
We play a couple Pokemon that we like to shove in the active spot that make life difficult for our opponent.

Snorlax may not be a focal point of this deck's strategy like it used to be, but it’s still a solid option to make active to slow our opponent down or force more resources out of them.
Klawf ex is useful versus decks that cannot one shot it. We can nearly infinitely Penny loop it and run our opponent out of energy.
Mimikyu is great against decks that do not have a good answer to it. Sometimes it can force our opponent to load up suboptimal Pokemon that we can exploit.
Best of the rest
And now all the random cards that are very good, but don't exactly fit into one category.

Eri and Miss Fortune Sisters are amazing disruption supporters. Oftentimes, people will try to play slow versus control and won't commit resources until they are ready. With Eri and Sisters, we have control over the deck and the hand, so no item card is safe!
Penny is great because most gameplans center around using one of our walls or attackers to tank a hit, then using Penny to pick it up to deny prizes.
Team Yell’s Cheer and Cyllene are very important for this deck, because most games will be very long and usually you will have to be able to reuse certain supporters potentially several times to be able to win. The combination of both is very important, since TYC can throw back in Cyllene and then Cyllene can throw back in Pal Pad and let us have pseudo-infinite resources.
Mela is a niche supporter that can let us swing with Radiant Charizard or Wigglytuff sooner than our opponent might have expected.
Cheren’s Care can essentially be a 4th copy of Penny sometimes, but also has the added perk of being able to pick up Wigglytuff or Pidgeot.
Iono is not only a bonus consistency supporter, but it also serves as our primary comeback option. Combining Iono with a big attacker like Rad Zard or Wigglytuff is sometimes crippling for the opponent.
Counter Catcher can either be used to drag something active that we can trap, or something that we would like to KO.
Lost Vacuum is great because it’s the only way to remove opposing stadiums in this deck, and it also has the added benefit of getting rid of annoying tools like Heavy Baton or Maximum Belt.
Tools Tools Tools
The split of tool cards may look like a mess, but everything is in here for a reason!
Bravery Charm is a generally good card. Buffing the HP of our various basics is quite good!
Rescue Board can let us have an early game pivot if we need to get back into Cleffa or Luxray. It can also give us a free retreater so we can Penny loop even if our Pidgeot got taken out.
Defiance Vest is better than charm in some cases. It works on evolution Pokemon (Wigglytuff and Pidgeot) and also is great for denying small amounts of damage (Charmeleon would hit Mimikyu for 10 instead of 50 making it a seven hit, but if we had a Charm on it would be a 3 hit)

Hero’s Cape is such a broken card in this deck! It turns out adding 100 HP to any of your Pokemon is very good!
The last card I want to touch on is Mist Energy. We can stick it on Wigglytuff so it cannot get nuked by Frenzied Gouging or Star Requiem, but also it has the utility of blocking TM: Devolution if we put it on Pidgeot!
The Matchups
I’m going to do my best in this section to briefly sum up the game flow of most matchups. However, people sometimes play very irrationally versus Control, so if you plan on playing this deck to a tournament, I recommend having quite a few games played with it so you can be familiar with how your opponent might try to counter your strategy. Blindly with this deck we will be choosing to go second, but in some matchups we will prefer to go first.

Charizard ex has cemented itself as the BDIF and this format has sort of turned into you either play Zard or try to counter it. Control happens to have one of the better Charizard matchups.
In previous formats, we would try to approach the Zard matchup by using Erika or Echoing Horn to bench an unwanted Pokemon. Then we would just win by retreat locking with Mawile. Retreat lock as a strategy has gotten a lot less good with the Tord list playing a bunch of Turos, so the Erika has been cut.
We still can comfortably win this matchup, because Klawf and Mimikyu are very tough for them to deal with. Mimikyu is great to force them into swinging with Charmeleon. Klawf ex is annoying for them to deal with, because they don’t play many energy cards. If they keep punching Klawf they will eventually run out of energies, since we can just Penny to heal it.
Once I get my Bird established, before I start using my disruptive attacker like Chi-Yu or Luxray, it is very important you either put Mist Energy on Pidgeot or have an Arven saved in hand so we do not get wrecked by TM: Devolution.
I prefer to start off the disruption with Chi-Yu over Luxray. Charizard lists have been going away from Maximum Belt in favor of Prime Catcher, so they would have no way of one hitting a Chi-Yu. We still have Eri to interact with our opponent’s hand and if we notice they are sitting on a bunch of Boss or have their own Team Yell’s Cheer in hand, we can pivot back into swinging with Luxray.
Another reason to not swing with Luxray is because a smart Charizard player will use Heat Tackle to KO their own Charmander to force us to take a prize, so Zard can hit 210. Luxray would help kill the Charmander quicker, but if we were using Chi-Yu they would have to decide if it is really worth it for us to get all those “free” mills. Usually they will start swinging with a Zard as soon as possible, putting pressure on us to play Penny, or start gusting our benched Pidgeot. It’s important we put the Hero's Cape on our Pidgeot, so we either force out Lost Vacuum or three gusts to take out our Bird. Once they have gone in with Charizard ex, we push up Mimikyu. Then they will spend all their Boss’s Orders to try to take 6 prizes, but eventually they will have to hit through the Mimikyu. Eventually they will go back into Charmeleon and at that point you can Penny up your Mimikyu and go back into Klawf. They can’t really afford to punch the Klawf over and over again, but also it feels terrible to retreat, and if they evolve the Charmeleon they lose an option to KO Mimikyu.
It usually comes down to us Penny looping either Klawf or Mimikyu until they run out of energy. One way you can stumble in the matchup is if you play into the opponent’s Eri, so make sure you don’t leave all your Pal Pads in your hand. Another way Zard may try to beat you is with Regieleki to recover their own resources. This does not really work if we use Luxray and discard whatever they brought back (We even can put 2 Double Turbo Energies on Luxray so we never KO their Regieleki)
Our deck poses a big logistical nightmare for Charizard. This is one of our best matchups!

Chien-Pao is a potentially very scary matchup. They can pressure our Pidgey with Radiant Greninja and can one hit anything in our deck with Chien-Pao. The good news is the best cards in their deck (Super Rod, Superior Energy Retrieval, Prime Catcher) are all items that we can discard with Eri or Sisters.
It’s important we opt to go first in order to minimize the potential of a Greninja KO on Pidgey, but if we have to go second we can stick a Bravery Charm on Pidgey to put it out of range of Greninja.
Sticking Mimikyu with Cape or Snorlax active early can be very good to slow them down. I like trying to set up 2 Birds in this matchup if possible, so if they gust one of them we can still keep Quick Search. For Chien-Pao to consistently chain big knockouts, it sort of needs to have Bibarel in play, but if they do we can just retreat lock it with Mawile. If they do not put down Bibarel they can have a tough time dealing with Luxray and Wigglytuff.
A staple endgame play in this matchup for us is to Iono them low, Counter Catcher up Baxcalibur, and KO with Wigglytuff. Without Bibarel it is extremely hard for them to answer this and we can just keep chasing all their Baxcalibur or even use Rad Zard to OHKO Chien-Pao.
Overall, I’d say this matchup is favored, but it can definitely go off the rails if you draw slow and they pop off.

On paper it seems like Future Hands should be an easy matchup. They don’t play very many switches so theoretically we would be able to retreat lock Iron Crowns. The issue with that is most lists play Psychic energy and Twin Shotels snipes the bench so we can’t Penny everything. So unless they bench three3 Crowns, we cannot win with Mawile. Taking 6 prizes with Radiant Charizard and Wigglytuff has to be our win condition.
However, the main issue in the matchup is how aggressive Hands is. They have the capacity to gust KO Pidgeot for three prizes fairly easily and at the very least are going to get an early lead and put a ton of pressure on you. Even though Pidgeot is potentially three easy prizes for them, if we don’t put it down we cannot assemble our combos fast enough and will get run over.
We can try to slow them down by pushing up Snorlax to deny early Peak Acceleration KOs or if we Counter Catcher up Iron Crowns without a Future Capsule attached and try to stall them out with Luxray. If we can successfully slow them down and build our board up, Wigglytuff can prize trade with the first Hands and Lost Vacuum can remove their Heavy Baton and make it difficult to set up a second one. Our endgame is usually Radiant Zard with Cape attached + Iono and we pray that they do not find a gust. Future is probably this deck’s worst matchup. We have ways we can counter them, but it pretty much comes down to whether they have it or they don’t.

Even though Lost Giratina and Lost Zone Box are technically different decks, we tackle them very similarly. Both decks really dislike Eri, Miss Fortune Sisters, and don’t have an easy way of dealing with early Luxray. So we want to combine our disruptive options to get rid of Mirage Gates and Super Rods to make it difficult for them to keep building new attackers. After Luxray goes down we try to prize trade with Wigglytuff or Rad Zard combined with Eri or Iono.
Ideally we have discarded enough of a certain resource that they cannot keep pace. Lost Box has a much harder time dealing with Mist Energy Wigglytuff than Tina does. Tina has Temple of Sinnoh so it can OHKO Wigglytuff with Star Requiem. If the Giratina player puts down Temple and Requiems Wigglytuff, we can push up Mimikyu to force them to retreat or burn a switch. After that we can continue to Counter Catcher up that Giratina VSTAR and try to win by trapping it. Versus Tina it is very good to either put a Cape or a Vest on Pidgeot so if they wanted to one hit it they would have to use their VSTAR power.
The main issue in this matchup is if we set up too slow or the Lost Zone player draws super hot which can make it a little difficult to keep up sometimes.

Once again I’m going to group 2 similar decks together (Ancient Box and Moon Dudunsparce) There are pros and cons in both matchups. Ancient Box has many bad starters. Opening Koraidon is terrible for them, because they have to bench a ton more Pokemon to deal any kind of damage; leading to the possibility of us being able to run them out of energies by forcing them to attach to everything. Flutter Mane also is not a great opener, since it eats up 3 energies to attack and can’t one hit charmed Mawile.
Ancient Box does have an easier time scaling big damage, whereas Moon Dudunsparce only has Roaring Moon ex to deal big damage. Neither deck can afford to bench Radiant Greninja or we can easily win with Mawile, so MoonSparce having a built in draw engine does make it’s early game much more consistent. Since both decks struggle to hit big numbers early, Luxray is our best friend to pick off Boss, Prime Catcher, Super Rod, or whatever other valuable trainers they may have. After Luxray picks apart their hand, it can be super difficult for them to deal with Wigglytuff ex that has Mist energy attached. The Dudunsparce build might play a copy of Temple of Sinnoh, but it’s very hard for them to have all the pieces to build up a Moon and Temple so they can gouge for the one hit. Even if they do that we can answer with Radiant Zard or Pidgeot and they have to start all over again. Both builds have to balance out putting enough stuff on the board so Iono does not ruin their day, but they can’t dig too deep and put themselves at risk to Chi-Yu decking them out.
There are so many ways this matchup can go wrong for the Moon player. Their best bet is gusting our Pidgey early and hoping it slows us down enough that they can get far ahead.

The initial motivation to test out Wigglytuff ex was as an attempt to beat Lugia, but it turned out to be good versus so much more. Lugia seems like a very scary matchup on paper. They have an attacker that can OHKO anything in the game and it’s basically impossible to trap anything since they play 4 Jet energy. Fortunately for us, their deck is notoriously inconsistent; a great weakness to capitalize on. There are two areas we can exploit Lugia; we can KO all their Cinccino so they have no one hit threat, or KO both Archeops to make building energy quickly impossible.
This is where Wigglytuff ex comes in. With a Hero’s Cape, Wigglytuff becomes very difficult for Lugia to deal with. If they want to preload energies onto Cinccino to be able to threaten an OHKO on Wigglytuff, we can gust KO that Cinccino. If they want to wait to load energies, we chase the Archeops. After we KO the first Archeops, we can chase the second one the following turn. After it gets KO’d, we have Radiant Zard or Pidgeot that can OHKO a Cinccino that they try to load up. Once both Archeops are knocked out, they no longer have a way to one hit out of nowhere, so we can Penny loop Chi-Yu and play for the deckout or try to take 6 prizes with Hero’s Caped Radiant Charizard.
The game gets a little sketchier if we have to go the Cinccino route. We try to kill all 3 Cinccino then try to sweep with Caped Radiant Charizard. This is a matchup where Mela can be clutch to load up a Pidgeot all in one turn to one hit a Cinccino.
Similarly to Future Hands, it’s pretty easy for this matchup to go off the rails if the Lugia player has the nuts. The difference is that Lugia is much more inconsistent than Future, so they rarely just have it like that.


Arceus Giratina is another matchup we like to go first into, otherwise they can easily Boss KO on Pidgey. This matchup can be very awkward for us. We do have walls like Mimikyu and Klawf that can be awkward for them, but lists are shifting more towards heavier Lost Vacuum and Lost City counts. Lost Vacuum is sort of the most important card in this matchup. Once they are gone, Caped Mimikyu or Rad Zard are very strong, but if we go in with those prior to discarding Vacuum, they can combo Lost Vacuum + Lost City and remove that threat entirely.
Moving in with Charmed Luxray is the move. It either discards valuable cards like Vacuum or Boss, or it baits them into using a Lost Vacuum + Choice Belt to OHKO Luxray. Once the Vacuum is gone we want to go into Caped Mimikyu, so even if they move in with Giratina V and shred, Mimikyu still lives. Once we bait the Tina we want to try to Penny back into Caped Radiant Zard and OHKO this Tina, removing their answer to Mimikyu. After the Giratina is KO’d they will either try to Boss and take their remaining prizes with Arceus or try to build a second Tina. We then go back into Mimikyu and bait the Tina again, and if we do the Rad Zard play a second time, they shouldn't have a way to answer to this Mimikyu. This entire game plan hinges on getting rid of the Lost Vacuum early on and our deck functioning properly.
Judge from the ArcTina player slowing us down even a couple turns can be enough for them to be too far ahead.

Gardevoir was one of Control’s closest matchups pre-rotation, but the loss of Shining Arcana Gardevoir is huge. Now a board of a bunch of Kirlias is not very good, so they can’t draw as many cards and hit their combos. An interesting element of this matchup in closed list tournaments is that they have to decide if it is worth it to play around Erika. It’s not as easy for them to Refine away all the trappable Pokemon because having a bunch of Kirlias is bad.
They basically have to have the perfect bench of two Ralts, one Kirlia, one Gardy ex, a Drifloon, and a Scream Tail, so nothing can get Mawile locked. Early Wigglytuff can be very tough for them to deal with, since they lack the draw power. We try to prize trade with Wigglytuff early on, then have Iono + charmed Zard as our late game move. If they overbench to try to deal with Wigglytuff, we have Mawile and Snorlax to win by spreading out all their energies.
We just have to be careful of Turo and Collapsed Stadium. If they go for a big Drifloon/Scream Tail KO on our Bird, we have Lost Vacuum to snatch a prize card.
This matchup has a lot of different ways it can go, but it feels quite manageable.
The last matchup I want to go over is Snorlax Stall. Conventional logic would suggest just going in with Chi-Yu as fast as possible, but that’s not the best play. We can still go for aggressive Chi-Yu, but once they start milling we want to try to 2HKO their Chi-Yu with Pidgeot. Once their Chi-Yu goes down, it is so hard for them to re-establish it. We go back into Chi-Yu and race ahead in the deckout race. We can even try to KO their 2nd Chi-Yu that they set up! It’s very important that we use Quick Search to stockpile Cyllene and Yell Cheer in hand so they don’t get milled and make sure you never let Eri get rid of all your Pal Pads. This matchup should be pretty free if you do the Pidgeot line.
That’s all I have for Bird Control! I hope this helps you better understand the deck. If you have any further questions about Bird Control, you can shoot me a DM on Twitter or Discord (@alloutblitzle) Huge thanks to TCEvolutions for giving me this platform to write on!
Happy Controlling :)